DIY Rain Stick: Craft Your Own Soothing Percussion Instrument
Have you ever been captivated by the gentle sound of rain? A rain stick can bring that peaceful feeling right into your home! These instruments echo the calming sounds of rainfall. They hold cultural importance too. They have been used for centuries in rituals and ceremonies. Imagine making your own! It’s simpler than you might think, and so rewarding.
Gathering Your Rain Stick Materials
First, gather everything you’ll need. Think about using materials you already have. This is a fun, eco-friendly project. Let’s collect the right stuff.
Choosing the Tube
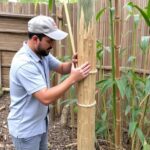
The tube is the rain stick’s main body. Cardboard tubes are easy to find. Bamboo offers better sound, and PVC pipe is durable. Mailing tubes work great. Check construction sites for PVC scraps. Bamboo might be at a craft store. Each offers different pros and cons.
Selecting Fillers for Sound
Next, pick your “rain.” Rice is a classic choice. Beans create a deeper sound. Small pebbles sound very natural. Birdseed makes a lighter, softer sound. Rice will give you a higher pitch. Beans will bring a lower tone. The amount needed depends on your tube size.
Gathering Obstacles
Internal obstacles slow the filler’s fall. Nails, toothpicks, and twigs work well. Skewers or cardboard spirals will do too. These obstructions create the “rain” sound. Make sure they are secure.
Required Tools
You will need some basic tools. A saw or knife cuts the tube. A drill or awl makes holes. Glue or tape secures the ends. Decorative materials add flair. Remember to be safe when using tools.
Preparing the Rain Stick Tube
Let’s prep the tube! This creates the rain stick’s frame. Precision helps with the sound later.
Cutting the Tube to Size
Cut the tube to your preferred length. A longer tube means longer “rain.” Use a saw or sturdy knife. Be careful to cut straight. 12-24 inches works well.
Sealing One End of the Tube
Seal one end of the tube securely. Cardboard or wooden discs work. Balloons or tape will also do. Make it airtight, to prevent leaks. This is important for sound.
Inserting the Obstacles
This is where the magic happens! Obstacles create the rain sound. Patience is key here.
Marking Obstacle Placement
Mark where the obstacles will go. Space them evenly along the tube. Consistent spacing gives a better sound. A ruler will help with this.
Creating Holes and Inserting Obstacles
Drill or poke holes at your marks. Insert the obstacles into each hole. Push them in deep enough to be stable. Don’t let them stick too far inside.
Securing Obstacles
Secure each obstacle with glue or tape. Bend any protruding ends carefully. This stops them from moving. Secure obstacles ensure the rain stick’s longevity.
Adding the Fillers and Sealing the Rain Stick
Almost there! Time to add the “rain.” Then seal everything up.
Adding the Fillers
Pour your chosen filler into the tube. Test different amounts to find the right sound. Not enough, and it will be weak. Too much, and the sound will be muffled.
Sealing the Second End
Seal the remaining open end. Make sure it’s airtight. Reinforce the seal like before. Now the sound is contained!
Decorating Your Rain Stick
Now, make it your own! Let your creativity flow. A decorated rain stick is also a work of art.
Painting and Coloring
Paint the tube with your favorite colors. Try different patterns and designs. Acrylic paint works well. Get creative!
Adding Textures and Embellishments
Add textures and embellishments. Wrap it with yarn, or glue on beads. Shells or fabric add flair. Make it unique!
Conclusion
Making a DIY rain stick is fun and relaxing. The calming sound is worth the effort. Experiment with materials to personalize yours. Each rain stick becomes unique. Share your creations online! Use #DIYRainStick to show it off.
For more tips on percussion instruments and to explore our premium cajon collection, visit Gappu.tv and join the rhythm revolution!